Catalog is a foundation of prestashop site which contains products and product categories. Building and improving your catalog is the main way you will make your website live in the eyes of the customer. Adding products does not only mean adding an image and some text, and then validating your content. It means knowing your product by heart: price, weight, size, features, specifications, details, manufacturer, supplier and so much more. Therefore, we will guide for you the way to add a new products.
Steps to add a new products in prestashop 1.6.x :
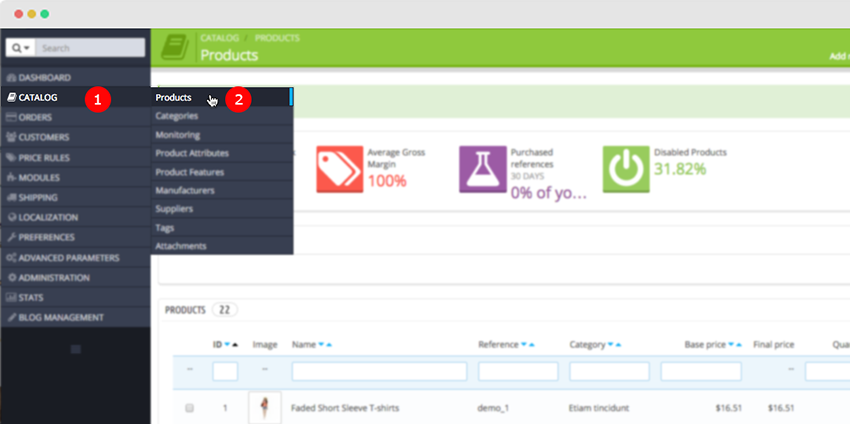
Step 1 : Open the admin section, go to Catalog >> Products.
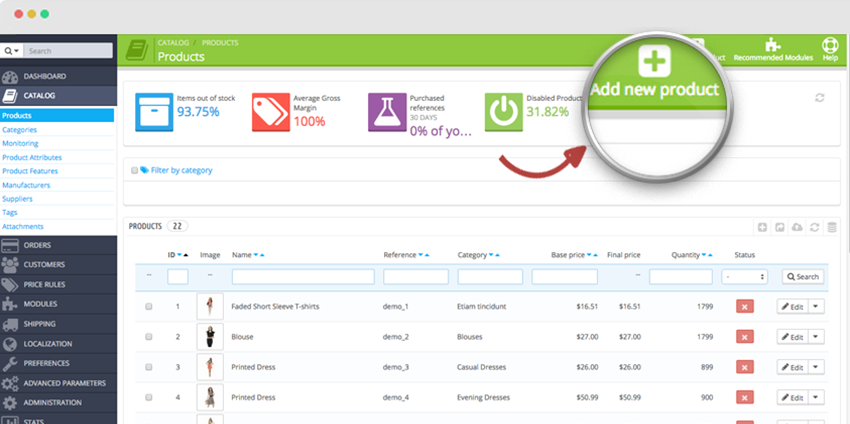
Step 2 : Click on Add new.
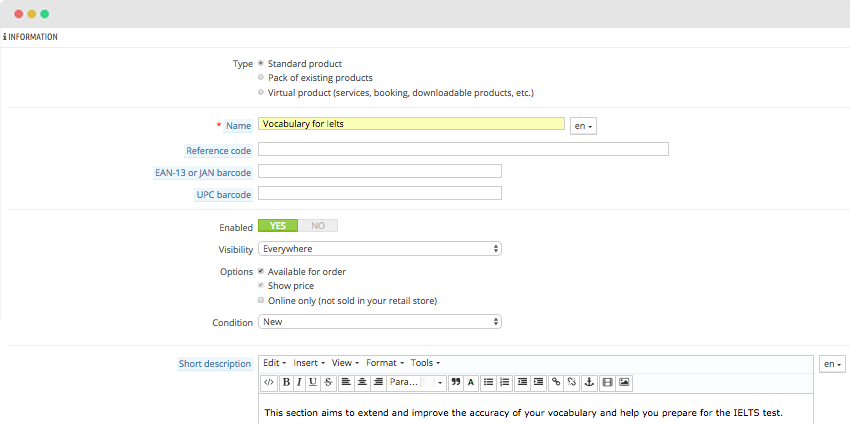
Step 3: Specify product type, name and other information, add short and full description.
- Name. Give your category a name.
- Parent Category. If you wish to create a subcategory belonging to a category other than the home page, choose the category under which it will appear.
- Root Category. You might want to use this new category as the new root category, instead of “Home”. If so, check the radio button that applies.
- Description. You should fill this field, because not only will it be useful to you or your employees, but some themes might also make use of it, displaying it to your customers.
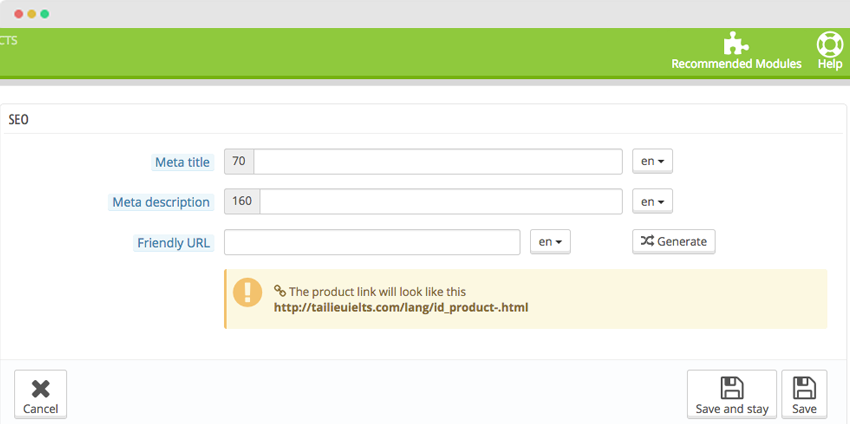
Step 4: Then, You choose Search Engine Optimization (SEO) tab . This information will help you improve the visibility of your catalog on search engines.
- Meta title. The title that will appear on the search engines when a request is made by a customer
- Meta description. A presentation of your category in just a few lines, intended to capture a customer’s interest. This will appear in search results
- Meta Keywords. Keywords that you must define in order to have your site referenced by search engines. You can enter several of them, separated by commas, as well as expressions, which must be indicated in quotation marks.
- Friendly URL. Enables you to rewrite the addresses of your categories as you wish.
Once you have finished configuring your category, save it, and you are ready to fill it with products.
Step 5: Specify product status and set prices.
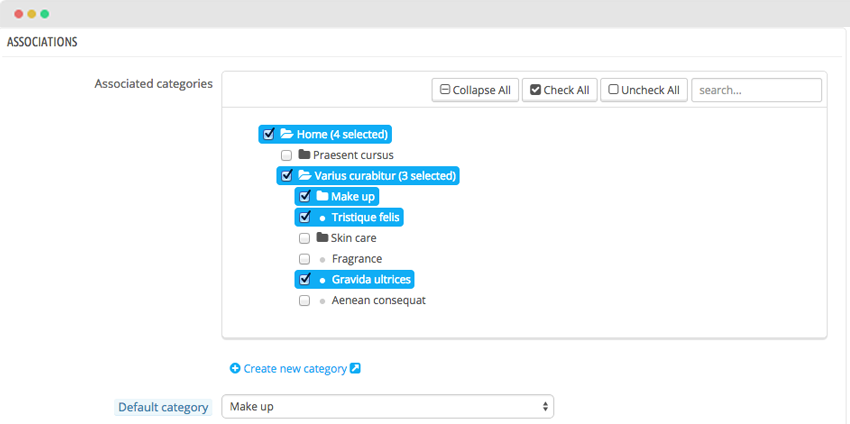
Step 6 : In the Associations section, you need to select product category. You may also add a new category.
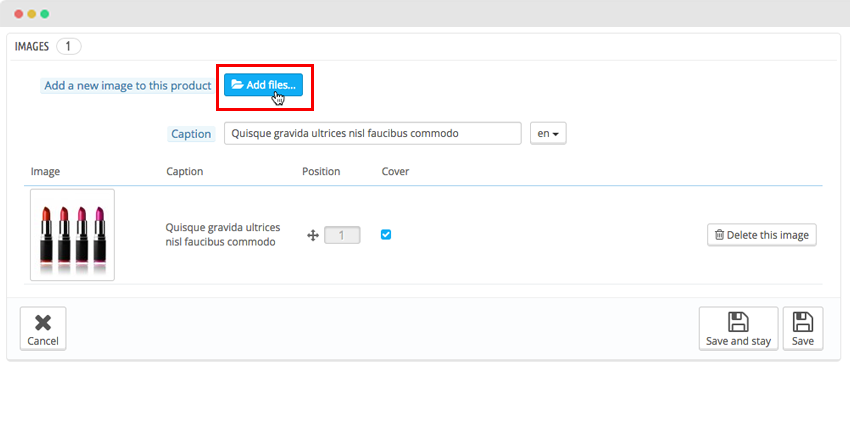
Step 7 : In Images tab, you can upload a product image. Click on “Add fields” to upload an image from your computer which will represent this category.You You can upload additional images as well.
Step 8 : Set other options where applicable and Save changes.
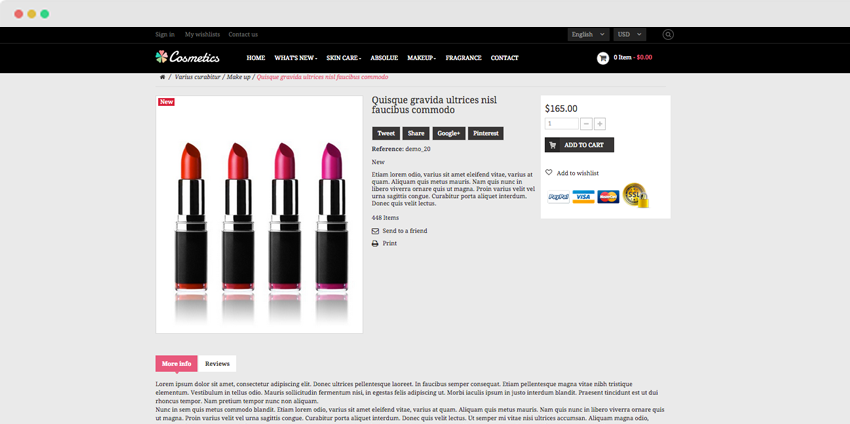
Step 9 : Now, working is completed . You can check it on the screenshot below.
Postscript : Hope this tutorial is much of help for you while developing your e-Commerce Prestashop site.


